Brake Pad Replacement: A DIYer’s Confidence-Building Repair
For many Haynes manual owners, replacing brake pads is a milestone project. It’s one of the first jobs where you really feel the difference in safety and performance after you’ve done it yourself. It can also be intimidating—after all, brakes are your car’s most important safety system. But with the right preparation, tools, and mindset, brake pad replacement is well within reach for beginners, and a great confidence booster for more experienced DIYers.
Why Brake Pad Replacement Matters
Brake pads wear down slowly every time you stop the vehicle. Once they’re thin, braking performance drops, stopping distances get longer, and your rotors may start to suffer damage. Replacing pads at the right time:
- Restores safe stopping power
- Prevents costly rotor damage
-
Gives you valuable hands-on experience
This job teaches skills that transfer to many other DIY repairs: removing wheels, working with calipers, handling fasteners, and staying organised.
When to Replace Your Brake Pads
You don’t need to guess—your car will give you clues:
- Squealing or screeching when braking (built-in wear indicators often cause this sound).
- Grinding noises, which usually means the pads are worn down to bare metal.
-
Dashboard warning lights (on vehicles with pad wear sensors).
-
Visual checks: If the pad thickness is less than 3 mm, it’s time.
Getting Ready for Your First Brake Job
Before you dive in, make sure you’ve done a few warm-up DIY jobs. If you’ve already rotated your tires, changed your oil, or replaced an air filter, you’ve built the basic skills: using a jack, loosening bolts, and following step-by-step instructions.
For a first-time brake job, preparation is half the battle:
- Tools you’ll need: Jack and jack stands, lug wrench, socket set, C-clamp or caliper tool, brake cleaner, rags, and a torque wrench.
-
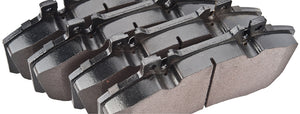
Parts: A set of replacement pads designed for your vehicle. Consider new hardware (clips, shims) too—often included in a kit.
The Haynes Way: Organising the Job from Start to Finish
At Haynes, we believe a brake pad replacement is as much about organisation as it is about turning wrenches. A well-structured job reduces stress, avoids mistakes, and keeps your vehicle safe when you finish. Here’s how to set yourself up for DIY success the Haynes way, along with some common challenges to watch for.
1. Preparation Before You Wrench
Check you’ve got everything: Tools, replacement pads, new hardware, brake cleaner, and gloves should be on hand before lifting the car. Nothing slows momentum like realising you’re missing a socket halfway through.
Choose your workspace wisely: A flat, well-lit area with plenty of room around the car is best. Uneven or cramped spaces make lifting and moving parts harder—and riskier.
Safety gear: Always use jack stands, not just a jack. Brakes are safety-critical, and so is your own safety while working.
Haynes Manuals Hint - Why we think it matters: If you stop mid-job to hunt for tools or fight with unstable ground, you’re more likely to cut corners and miss details.
2. Work One Side at a Time
It’s tempting to pull both wheels off and get everything apart at once. Don’t. Keep one side intact so you can reference it if you forget where a clip or shim goes.
Haynes Manuals Hint: Brake hardware clips look similar but aren’t always identical side to side. A quick check against the “untouched” side prevents mix-ups.
3. Managing Bolts, Clips, and Small Parts
Use a magnetic tray, egg cartons, or labelled zip bags to keep bolts grouped by step.
Place removed pads and clips in order—they’re often installed with left/right or inner/outer orientation.
Haynes Manuals Hint: Mixing up bolts or leaving out a clip can cause brake noise, uneven wear, or even dangerous brake failure.
4. Handling the Caliper Safely
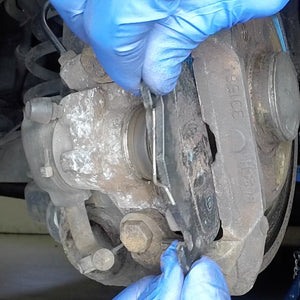
Once unbolted, the caliper is heavy and connected by a flexible brake hose. Never let it dangle. Use a length of wire, a bungee cord, or a sturdy hook to suspend it from the spring or frame.
Haynes Manuals Hint: A strained or kinked brake hose can create leaks or weak pedal feel later. Hanging the caliper properly prevents this hidden hazard.
5. Cleaning and Preparation
Brake dust, rust, and old hardware all need attention. Spray down the caliper bracket with brake cleaner and wire-brush any rust from contact points. Replace or lubricate guide pins with high-temp brake grease.
Haynes Manuals Hint: Skipping cleaning or lubrication often leads to squeaks, sticking brakes, or uneven pad wear—not the result you want after all your effort.
6. Compressing the Caliper Piston
This step can be tricky the first time. A C-clamp, piston tool, or even a large adjustable wrench can be used to press the piston back into the caliper.
Haynes Manuals Hint: Forgetting to remove the brake fluid reservoir cap or monitor fluid level can cause overflow. Always check the reservoir and place rags around it.
7. Installing New Pads and Hardware
Align the pads and clips carefully, ensuring they sit flush and move freely in the caliper bracket. Follow the orientation shown in your manual.
Haynes Manuals Hint: Misaligned pads cause uneven braking, noise, or damage to rotors. A few extra minutes double-checking saves hours of troubleshooting later.
8. Reassembly and Torque
Reinstall the caliper, making sure bolts are torqued to the manufacturer’s specification. Do the same when refitting the wheel.
Haynes Manuals Hint: Overtightening caliper bolts can strip threads; under tightening risks bolts loosening while driving. A torque wrench eliminates guesswork.
9. Final Checks Before Driving
Pump the brake pedal until it feels firm—this seats the pads against the rotors.
Recheck brake fluid level.
Spin the wheels by hand (with the car still on stands) to confirm free movement.
Haynes Manuals Hint: These steps confirm your brakes are operational before you head out on the road. Skipping them can lead to the frightening moment of pressing the pedal and finding it goes straight to the floor.
10. The Test Drive
Perform a cautious test drive, starting at low speeds in a safe area. Gently apply the brakes several times to bed in the pads. Listen for unusual noises and feel for vibration.
Haynes Manuals Hint: New pads may squeak lightly at first, but grinding or pulling to one side signals a mistake in installation. Stop and recheck your work immediately.
Good Practices and Pro DIY Tips
-
Work clean: Brake dust is harmful—use brake cleaner, not compressed air.
-
Don’t rush: Take breaks if needed. A calm approach avoids mistakes.
-
Check your fluid: As you push caliper pistons back, brake fluid may rise in the reservoir. Keep an eye on the level.
-
Test carefully: After reassembly, pump the brake pedal before driving—this seats the pads and restores hydraulic pressure. Then do a slow test drive.
Building Confidence, Step by Step
Every DIYer remembers their first brake job. It’s the project that turns “I think I can” into “I know I can.” You’ll come away with more than just fresh pads—you’ll gain the confidence to tackle bigger jobs, from replacing rotors to suspension work. We have even written a manual about it.
"Start small, prepare well, stay organised, and you’ll not only keep your car safe but also keep building your skills as a capable DIYer". Haynes Editorial Team


