Possibly the most horrific, humiliating sound on our roads – the common squeaky brake is an annoyance nobody wants to be around. It puts people in a bad mood, distracts them from all-around enjoyment, and scares away your hot date. Many people just put up with this atrocity for a long time, whereas others want to get it fixed immediately.
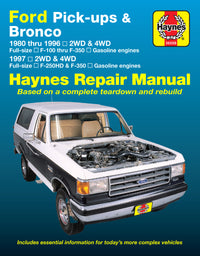
What if we told you the most common reasons for this happening, and how to fix them? Well, you’re in luck. Grab a Haynes manual, high-temp brake lubricant, a basic mechanic’s toolset, and let’s get started.

Why does it happen? I just replaced my brakes!
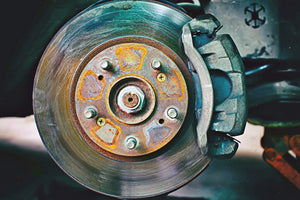
The reason you hear an annoying squeak is most likely due to an unwanted high-frequency vibration or oscillation somewhere at the brakes. Usually, this is due to a lack of lubrication within the brake components. If the components were recently replaced and weren’t lubricated properly or the wrong type of lubricant was used, this can be a main cause of them squeaking. Another reason would be that throughout normal use, some lubricant has dried up or worn off, and two metal points are contacting each other as the brakes are applied.

Things YOU can do to fix – Disc brakes
First off, this is the kind of brake squeak that happens as a result of poor lubrication somewhere in the disc brake system. This is NOT a sound made by the pad wear indicator, indicating that the brake pads are low and need to be replaced. Check that the pads are in good condition before proceeding.
To fix this kind of squeaking, you’ll need to properly support your vehicle, pull the wheels off, and disassemble your brakes. If you’re only hearing squeaking on one side, you’ll still need to take the same care for the opposite side brake, as uneven braking can occur if both sides don’t get the same treatment. Always complete this work in pairs, working on one side at a time! But don’t worry, our Haynes books explain how this process is done, and provides clear instructions for reassembly.
Be sure to buy lots of brake cleaner (more than you think you’ll need). Liberally spray down the brakes before beginning and along the way when disassembling, to prevent breathing in brake dust.
For a typical disc brake – Here are some common points of contact to lubricate, from most-likely to squeak to least-likely. Be sure to use the right type of lubricant – most modern disc brake systems use high-temperature silicone brake lubricant (clear/translucent):
- The backside of the brake pads, where the pads contact the caliper piston(s) (inner) and the caliper body (outer). Auto parts stores also supply an “anti-squeak” compound, which is a type of rubberized backing and can be substituted for lubricant, only for applying to the backs of pads.
- Between the metal brake backing shims and the backside of the pads – Usually they come with metal shims that are pre-installed to the backs of the pads. If it’s too loose of a fit, sometimes an oscillation can develop once reinstalled and it may help to lubricate the contact points in between.
- The brake pad support plates – Also sometimes called “shims”, these are where the pad ends rest in the caliper, and should always be replaced as they tend to rust heavily. A tiny bit of lubrication on these support plates where the pads rub against can go a long way.
- Slide pins – The area in which the whole brake caliper slides back and forth when applying and releasing the brakes. These should be cleaned thoroughly and re-greased with a fair amount of brake lubricant before reinstalling.
- Caution – Don’t get any brake lubricant on the disc or the face of the brake pads, as this can ruin your brakes!

Things YOU can do to fix – Drum brakes
To fix this kind of squeaking, again you’ll need to support your vehicle (most likely the rear), pull the wheels off, release the parking brake, and disassemble your brakes starting with the brake drum.
To state it twice, if you’re only hearing squeaking on one side, you’ll still need to take the same care for the opposite side brake, as uneven braking can occur if both sides don’t get the same treatment. Always complete this work in pairs, working on one side at a time! Consult your Haynes book as drum brakes are a bit more tricky to work on, if it’s not what you’re normally used to.
Be sure to buy lots of brake cleaner (more than you think you’ll need). Liberally spray down the brakes before beginning and along the way when disassembling, to prevent breathing in brake dust.
For a typical drum brake – Here are some common points of contact to lubricate, from most-likely to squeak to least-likely. Be sure to use the right type of lubricant – most modern drum brake systems use high-temperature brake grease (black) and is easily applied with a small paint brush/grease brush:
- Brake shoe contact points on backing plate – Once the shoes have been separated from the backing plate, these contact points tend to cause the most noise. The contact points should be slightly elevated/indented for easier identification.
- Brake shoes! – If the friction material on the shoes are worn out, it exposes the metal rivets holding the material together. If these rivets contact the rotating drum, you’ll summon demons along the way with a loud and unwanted “screeech”. Check the condition of the shoes and replace them to prevent damaging the drum.
- Drum brake adjuster, levers and other end contact points – Basically anywhere you see metal-to-metal contact points is where a dab of lubrication is necessary. Be sure not to allow any grease to contact the shoes or drum!

Safety measures when working on brakes and when reassembling them
- Take into consideration the order in which components were removed and which components go where, and clean up any grease or lubricant that may have contacted the friction surfaces with an absorbent rag saturated in brake cleaner.
- Always wear gloves and eye protection when doing any kind of brake work, and wear the necessary and approved mask to prevent inhaling nasty chemicals.
- As the components are assembled, tighten all brake fasteners to the correct torque settings (found in your Haynes manual).
- Test drive the vehicle and verify proper brake functionality at low speeds, and the lack of any annoying squeaks or screeches you’ve been longing for.


