What Is a Drive Axle?
On early cars, the drive axle was just a solid rod with two wheels on it turned by a chain, just like on a go-kart, and in your car or truck it still performs the same function; delivering power from the transmission to the wheels. Trucks, and cars with a solid rear axle, still have a simple rod hidden inside the differential to deliver power, and these seldom need any attention. But modern cars with independent rear suspension or front wheel drive have a much more complex axle with constant velocity (CV) joints on either end allowing them to steer and follow the contours of the road.
This increased complexity means increased chance of something going wrong, but in return the car has better traction, ride, and handling. Modern drive axles typically are short rods with a flexible, rubber boot covered joint at each end. That boot is important to hold the grease inside, and the grease is important to keep the CV joint functioning properly.
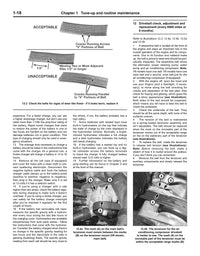
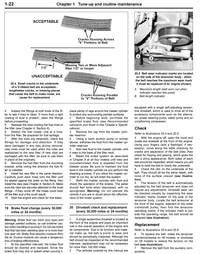
 If you hear a clicking that varies with road speed and gets loader when going around corners, chances are you have a bad CV joint and need to rebuild or replace the axle. To keep CV joints health inspect the boots for tears and leaks every 30,000 miles or two years.
Why the Drive Axle Needs to be Changed
When to Change the Drive Axle
Every vehicle is different, so find yours and get the full instructions...
How to Change the Drive Axle
This clip is just a sample of the vehicle specific videos included in our online manuals. Every vehicle is different, but here is a general overview of how you remove a drive axle on a front wheel drive vehicle (an independent rear axle is similar):
- The axle nut requires a large amount of torque to loosen, if possible break it free before raising the car.
- Loosen the lug nuts.
- Open the hood, block the wheels, then raise the car and support it on jack stands.
- Remove any splash shield or access panel to expose the inner CV joints.
- Part of the exhuast system may need to be removed as well, especially on rear-wheel drive cars.
- Place a steel punch in the edge of the brake rotor and rotate it until it contacts the brake caliper.
- Working against the punch, loosen the axle nut. There may be a cotter pin or staked edge keeping the nut in place.
- Loosen the lower ball joint and remove the lower control arm from the steering knuckle.
- With the old axle nut protecting the end of the axle, tap with axle while pulling the steering knuckle out and away.
- Remove the nut and slide the axle out the back of the hub.
- Use a length of rope or wire to support the axle while you remove the inner end.
- Some vehicles use bolts or clips to secure the inner axle, while others can be just pulled free with a slide hammer.
- Place a drain pan under transmission/differential to catch any fluid that might leak out.
- Be careful when removing axle from transmission/differential that you don't damage the seal inside.
- Installation is the reverse of removal, but in most cases a new axle nut should be used.
Before You Begin
Tools you will need
Only basic tools are needed for this job, though your car or engine may need specfic tools not listed here.
- Socket for axle nut
- Breaker bar with long handle
- Socket and ratchets/wrenches
- Torque wrench
- Ball joint press
- Steel punch
Parts you will need
- New axle nut
- New/rebuilt axle
- CV joint boots
- Transmission fluid/differential fluid
How Much Does an Axle Replacement Cost?
- $125-250 (varies by car) for axle and nut
- $250-500 saved in labor costs!

