The CV boot at each end of your vehicle's drive axle is vital to the health of each CV joint.
CV joints are flexible links that allow the gearbox to transmit drive through the drive axle to the front wheels. They are flexible, to allow the wheel to move up and down as the suspension compresses and extends, so even if you're traveling off road, or simply climbing steep ramps in a car park, the driveshaft should work just as intended.
What’s inside a CV boot?
CV joints need to be bathed in grease in order to work correctly, which is where the CV boots come in, because they are filled with grease and shroud the CV joint, keeping it protected.
However, if the CV boot splits, the grease can leak out and dirt can get in, which causes the joint to wear out. So how do you check if your CV boots are in good health?
CV boot kits can cost around $20, but if one splits and lets out all the grease it contains, you can end up with a big repair bill from a workshop because of the labour involved.
If you hear a clicking noise that is especially pronounced when tuning a corner, chances are a CV joint has gone bad.
In extreme cases, if you ignore the clicking noise the CV joint can eventually fall apart. When this happens, you'll be left staring at a car that runs perfectly well, but which can't actually move itself.

How to check your CV joint boots
-
Jack It Up - You won't have decent access to the CV joints while the car is on the ground, so get it raised up and supported on jack stands. Once up, take off the relevant wheels, which should give you decent access.
-
Clean Up - ?The inner fender and front suspension will be thick with road dirt and filth, so wash the area. Don't worry too much about getting the brakes wet, but try not to get soap on the discs.
-
Full Lock - ?Turn the steering wheel until it's on full lock. This will give you room to get your head behind the wheel hub, where you’ll be able to better see the outer CV joint boot.
-
Tied Up - The CV joint boots are held in place by circular clips, either metal or plastic. Check these first. If they’re present, correct and tight that’s good.
If they’re missing or if they're just a zip tie, you may well have dirt within the CV boot, or a lack of grease. You may need a CV boot banding tool for this. Replace a missing tie asap, but not before pulling the CV joint back from the wide end to check that there’s nothing in there but grease.
-
’Box clever? - At the inner end, look for any signs of grease leaking out. Again, check the ties or clips and ensure that they’re holding the CV boot tight and in place.
-
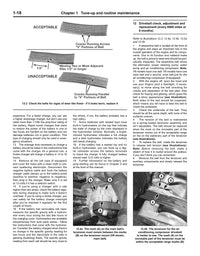
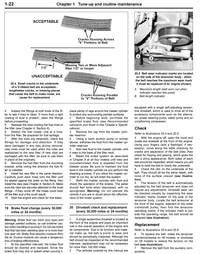
Give Them a Massage - Rubber CV boots should be pliable. If they are dry and inflexible, they don't have many miles left on them. To be sure what state they're in, pull them, twist them, push the folds apart and look into the crevices.
Look for any signs of cracking or cracked rubber, and check for splits and cracks. You may not see these with just a casual glance, which is why you need to get your hands on the boots – and use a good flashlight.
-
Listen Closely - Spin the brake disc with the transmission in neutral. You'll often be able to hear a CV joint that is starting to go bad if you listen closely. The quiet clicking of a joint that has stated to fail is easy to miss when driving, but much more obvious from under the car with the wheel off.
-
Clean, Road Test, Repeat - If you can’t see any cracks or leaks and hear no clicks, but still want to be absolutely sure, give everything a good clean and then snap a picture with your phone.
Then go for a test drive, making sure to stay on clean roads and parking lots, and then have another look. Do lots of tight turns to really flex the CV joints. If there are any grease spots when you look again, you know your CV boots are weeping. Simple.

CV joint boot replacement
If you do find a leaking or torn CV joint boot, you'll have to remove the entire drive axle and replace the boot, and often the CV joint, which your Haynes Manual will show how to do.
If you can get away with just replacing the boot and not the joint, you'll still need a CV boot kit, preferably with a CV boot cone, to help make fitment easier.
Depending on how many miles the car has on it, a rebuilt drive axle complete with CV joints and boots is likely the solution.
In a pinch, if the CV joint appears to be in okay shape otherwise, a split CV joint boot can be quickly installed. Just like they sound, split boots, or quick boots, are sliced down one side to allow them to be fitted without removing the axle. Unfortunately, even the best split boot with good adhesive to seal up the split, isn't as good as an unsplit boot.
An alternative solution would be repair, using something like a Techi CV boot repair kit, which contains compounds and tape to effect a repair. Some owners have reported better results with a repair kit than using split boots, but both methods have to be viewed as temporary repairs.
When the time comes to replace the drive axle, you will find information in your Haynes manual, but here is a general how to - Drive Axle Removal and Replacement

