Why Engine Air Filters Matter
-
The engine works harder to breathe.
-
Fuel economy drops.
- Acceleration feels sluggish.
-
Over time, the engine’s lifespan may be reduced.
When to Replace Your Engine Air Filter
-
Mileage – Most manufacturers recommend replacement every 15,000 to 20,000 miles, but always confirm in your Haynes manual depending in the way you use your vehicle, environmental conditions etc. We tend to focus on use rather than only mileage or age
-
Driving conditions – Dusty, gravel, or urban stop-and-go driving can shorten the filter’s life.
-
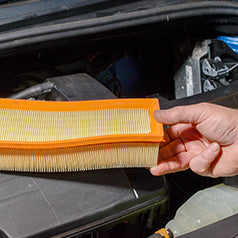
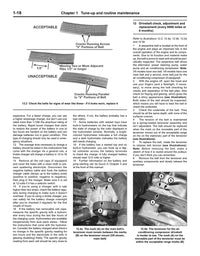
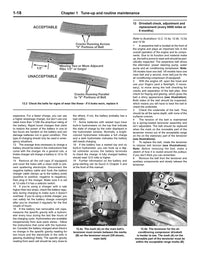
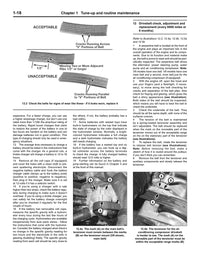
Visual inspection – If the filter looks dark, clogged, or full of debris, it’s ready for replacement.
Haynes Manuals Hint – Poor fuel economy, rough idle, or reduced power can point to a dirty filter.
Getting Ready for Your First Replacement
If you’ve never replaced an engine air filter before, a few simple jobs can prepare you:
-
Practice under the hood – Check your fluids (oil, coolant, washer fluid) to get used to working in the engine bay.
-
Tool familiarity – Use a screwdriver or socket wrench on smaller, non-critical jobs to build confidence.
-
Observation – Take a look at the engine air filter housing and notice how it’s secured (clips, screws, or bolts).
These small steps help you feel more comfortable and organised when it’s time to tackle the replacement.
Haynes Manuals Preparation Tips
-
Buy the right vehicle-specific filter – Use your make, model, and engine size to confirm fit.
-
Gather tools – Most often a screwdriver or socket wrench is all you’ll need.
-
Choose your workspace – A well-lit, flat area with minimal wind is best.
-
Plan your time – Give yourself 20–30 minutes so you don’t feel rushed.
The Haynes Manuals DIY Approach: Organising the Job from Start to Finish
Organisation is the key to every successful DIY job. The Haynes DIY method, is designed to build good habits and a repeatable approach to success — a practical way to prepare, execute, and finish confidently. Here’s how it works for air filter replacement:
1. Prepare Your Workspace
- Lay out your new filter and tools before you begin.
- Use a small tray, magnetic dish, or even a muffin tin to hold screws, clips, or bolts.
- Keep a clean rag handy for wiping dust and dirt from the air box.
Haynes Manuals Hint: A clean, organised setup reduces the chance of losing parts or skipping steps.
2. Always Document Before You Remove
- Take a quick photo of the filter housing before opening it.
-
Snap another shot of the old filter in place.
Haynes Manuals Hint: Photos act as a roadmap, making it easy to reinstall the new filter correctly and avoid orientation mistakes.
"No matter how big or small the task is, we always document our steps as part of the process" Haynes Editorial Team
3. Remove and Inspect Carefully
-
Release clips or unscrew bolts slowly, one at a time - often these are not in obvious locations so check your vehicle-specific Haynes manual.
-
Place fasteners directly into your parts tray so nothing disappears into the engine bay.
-
Remove the old filter gently to avoid knocking dirt into the air intake.
Haynes Manuals Hint: Dropped fasteners. If this happens, use a magnetic pickup tool or long-nose pliers — don’t leave them rattling around.
4. Clean Before Installing
-
Wipe out any leaves, dust, or bugs from the air box.
- Check the housing seal for cracks or damage.
Haynes Manuals Hint : A clean surface ensures the new filter sits correctly and seals tightly, preventing unfiltered air from sneaking in.
5. Install the New Filter
-
Position it exactly as the old one sat — flat, with edges aligned.
-
Double-check that no gaps or lifted corners are present.
-
Re-secure the air box with all clips or screws tightened evenly.
Haynes Manuals Hint: Misalignment. If the lid won’t close smoothly, don’t force it — recheck the filter’s position.
6. Test and Record
-
Start the engine and listen for unusual whistling or rattles.
-
Note the date and mileage in a logbook, your phone, or on a sticker under the hood.
Haynes Manuals Hint: Good records help you track your work, spot patterns, and plan your next replacement. Whether handwritten notes in your manual, a well ordered file of photos on your phone, you will be thankful over time that you can review your work.
Why the Haynes DIY Method Builds Confidence
- Stay organised so you don’t lose parts.
- Check your work to avoid mistakes that are easily made without following a structured method.
- Develop good habits you’ll reuse for spark plugs, brake pads, and beyond.

