All Haynes Digital Online Manuals are currently 50% off. They feature everything you love about our books in an instantly accessible digital online form, that you can use via any device with an internet connection.
This page is taken directly from our online manual 24067 for the 2007-2013 Chevy Silverado/GMC Sierra 1500, 2500 & 3500, Chevy Tahoe and Suburban, and GMC Yukon, Yukon Denali, and Yukon XL. It will guide you in removing and replacing the fuel pump and fuel level sending in the fuel tank.
Note: In order to access the fuel pump lock ring on the top of the tank, you must first lower the tank from under the truck. This procedure is best done when there is less than a quarter of a tank of fuel in the tank.
-
Disconnect the cable from the negative battery terminal (detailed instructions are in Chapter 5, Section 1 of the Haynes manual).
-
Relieve the system fuel pressure at the Schrader valve on the fuel rail in the engine compartment (detailed instructions are in Chapter 4, Section 2 of the Haynes manual). Then equalize tank pressure by removing the fuel filler cap.
-
Raise and support the truck on jack stands. Remove the fuel tank by first disconecting the filler neck, filler EVAP line, and fuel supply line (detailed instructions are in Chapter 4, Section 5 of the Haynes manual). Support the tank, loosen the fuel tank strap bolts and lower the tank just enough to disconect the electrical connections to the fuel pump and sending unit.
-
Disconnect the EVAP vent line, the fuel tank vent line fitting and the fuel supply line quick-connect fittings from the fuel pump/fuel level sending unit mounting flange.
-
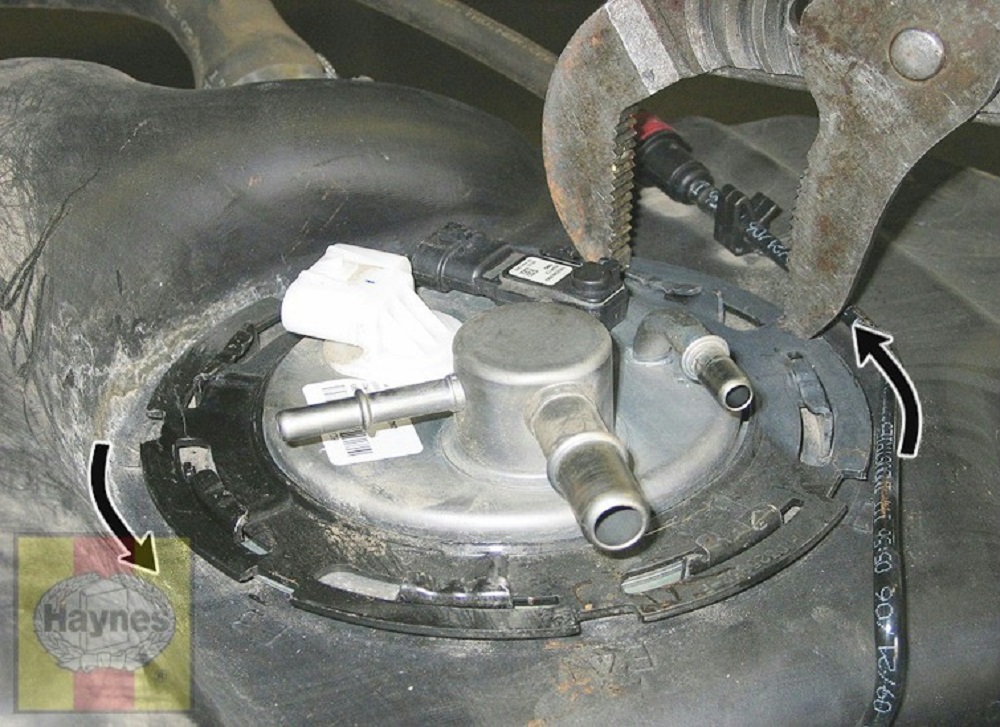
(See illustration) Using a pair of large water pump pliers, unscrew the fuel pump/fuel level sending unit module lock ring by turning it counterclockwise. If the lock ring is too tight, use a hammer and a brass punch to loosen it (don’t use a steel punch, which could produce sparks and cause and explosion).
Use a large pair of water pump pliers to unscrew the fuel pump lock ring; if the lock ring is too tight to loosen this way, carefully tap it loose with a hammer and a brass punch.

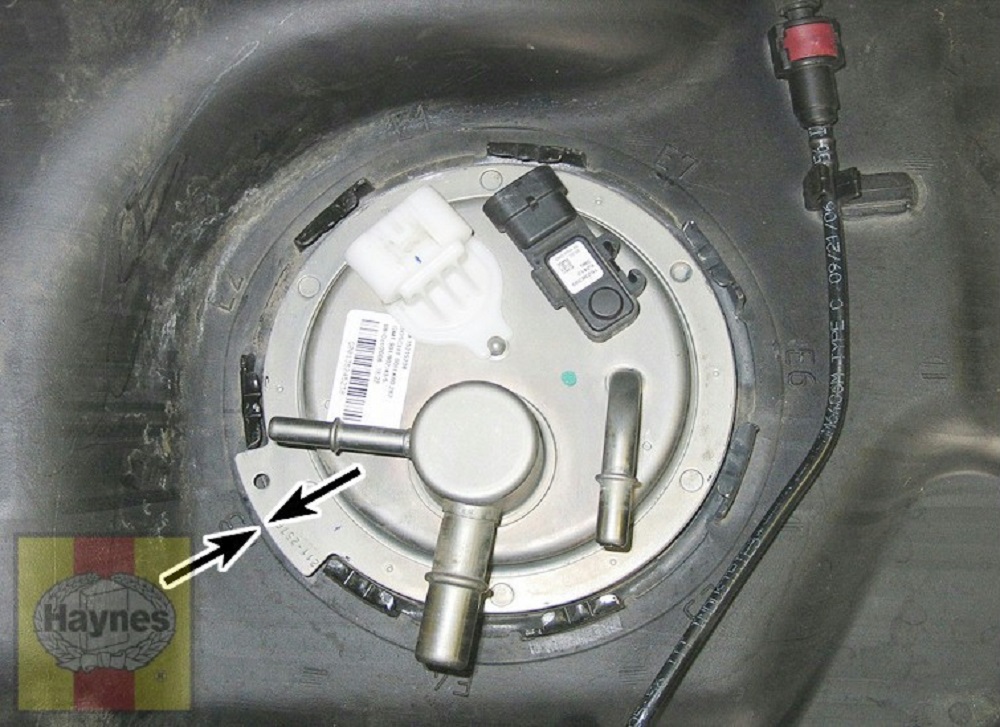
- (See illustration) Note the orientation of the pump mounting flange and mark the orientation of the fuel pump in relation to the fuel tank to ensure that the fuel pump is correctly realigned when you install it again. If you’re going to install a new pump, note the location of your alignment mark on the old pump and make a mark at the same spot on the new unit.
To ensure that the pipes for the EVAP vent line, fuel tank vent line and fuel supply line are oriented correctly when you install the fuel pump/fuel level sending unit, make alignment marks on the tank and the pump flange at this wider part of the flange.

- Remove the fuel pump/fuel level sensor module high enough to disconnect the quick-connect fitting for the ventilation harness, then remove the pump assembly (see illustration) , taking care not to damage the fuel level sensor float arm and float.
Carefully remove the fuel pump/fuel level sensor module from the fuel tank; once the module has cleared the mounting hole in the tank, angle it as shown to work the float arm through the mounting hole without damaging anything.

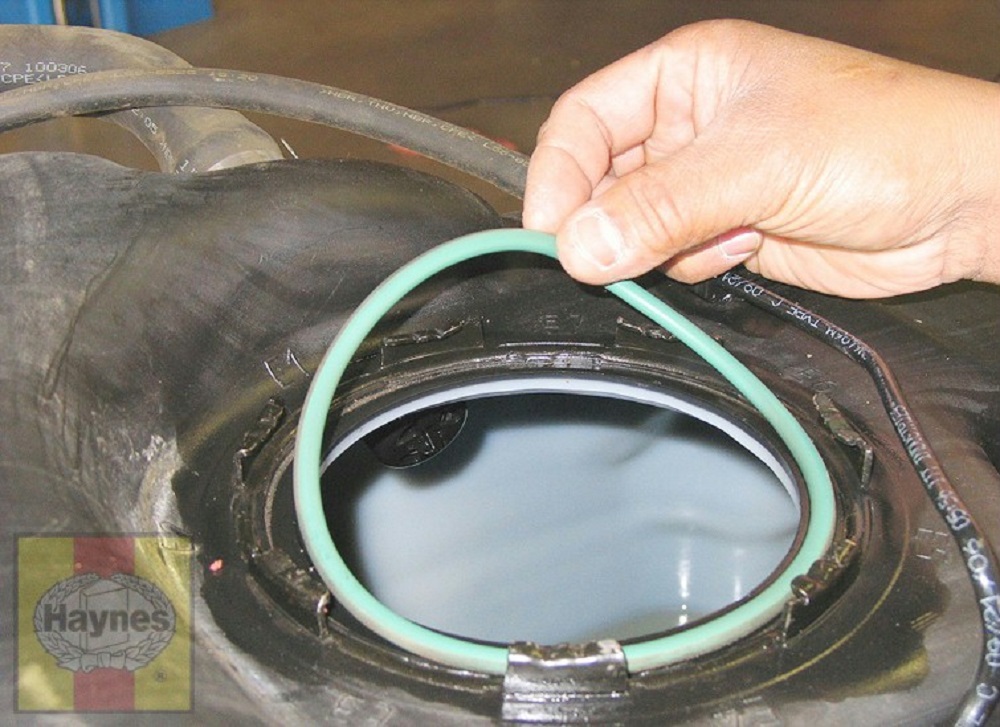
- (See illustration) Before installing the pump, inspect the O-ring for cracks, tears and deterioration. If it isn’t in perfect condition, replace it.
Remove and inspect the O-ring seal for the fuel pump mounting flange; if it’s cracked, torn or deteriorated, replace it.

-
Insert the fuel pump/fuel level sensor module into the fuel tank, align the mark that you made on the fuel pump/fuel level sending unit flange with the mark you made on the tank and carefully seat the pump flange on the tank. Make sure that you don’t damage the float arm or the float during installation. If the float arm is bent, the fuel level that is indicated on the fuel level gauge on the instrument cluster will be incorrect.
-
Installation is otherwise the reverse of removal.

